by Yuval Fisher – CyOps Analyst
Cynet is always on the hunt for new malware techniques, a pursuit that leads us to many variations on similar methodologies. One we constantly encounter is the process injection, for which Cynet has a specific detection and real-time remediation strategy.
Process injection is a widespread defense evasion technique commonly employed within malware and fileless adversary attacks. It entails running custom code within the address space of another process. Process injection improves stealth, and some variant techniques also achieve persistence.
Running code in the context of another process may allow access to the process’s memory, system/network resources, and possibly elevated privileges. Execution via process injection may also evade detection from security products since the execution is masked under a legitimate process.
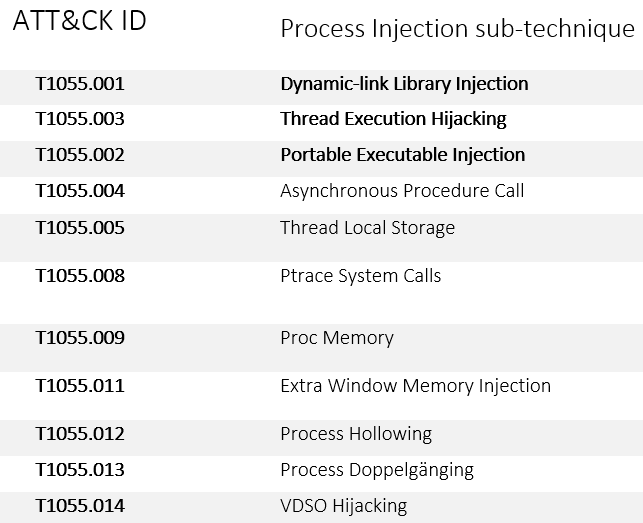
This method includes many sub-methods – the MITRE ATT&CK framework catalogued 11 sub–techniques. In this article we will explore the three main process injection methods and analyze this technique in the wild:
This is part of an extensive series of guides about Malware Protection.
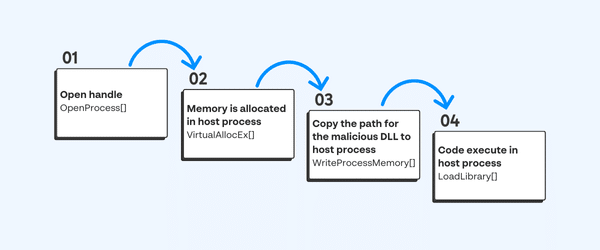
Classic DLL injection is one of the most popular techniques in use. First, the malicious process injects the path to the malicious DLL in the legitimate process’ address space. The Injector process then invokes the DLL via a remote thread execution. It is a fairly easy method, but with some downsides:
Steps for preforming the attack:
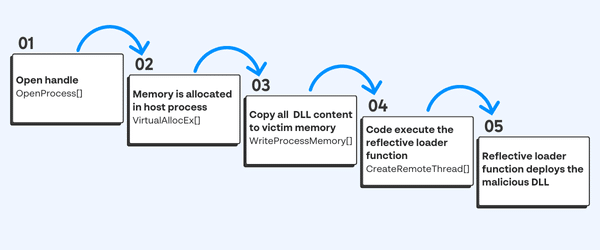
Reflective DLL injection, unlike the previous method mentioned above, refers to loading a DLL from memory rather than from disk. Windows does not have a LoadLibrary function that supports this. To achieve the functionality, adversaries must write their own function, omitting some of the things Windows normally does, such as registering the DLL as a loaded module in the process, potentially bypassing DLL load monitoring.
Main attack flow:
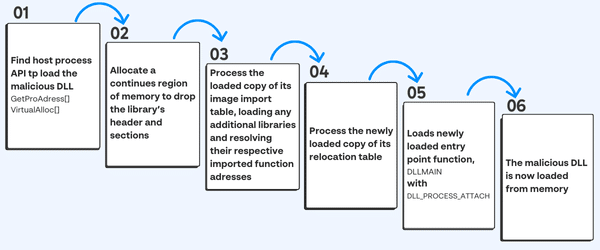
Reflective loader function flow:
Thread Hijacking is an operation in which a malicious shellcode is injected into a legitimate thread. Like Process Hollowing, the thread must be suspended before injection.
Attack flow:
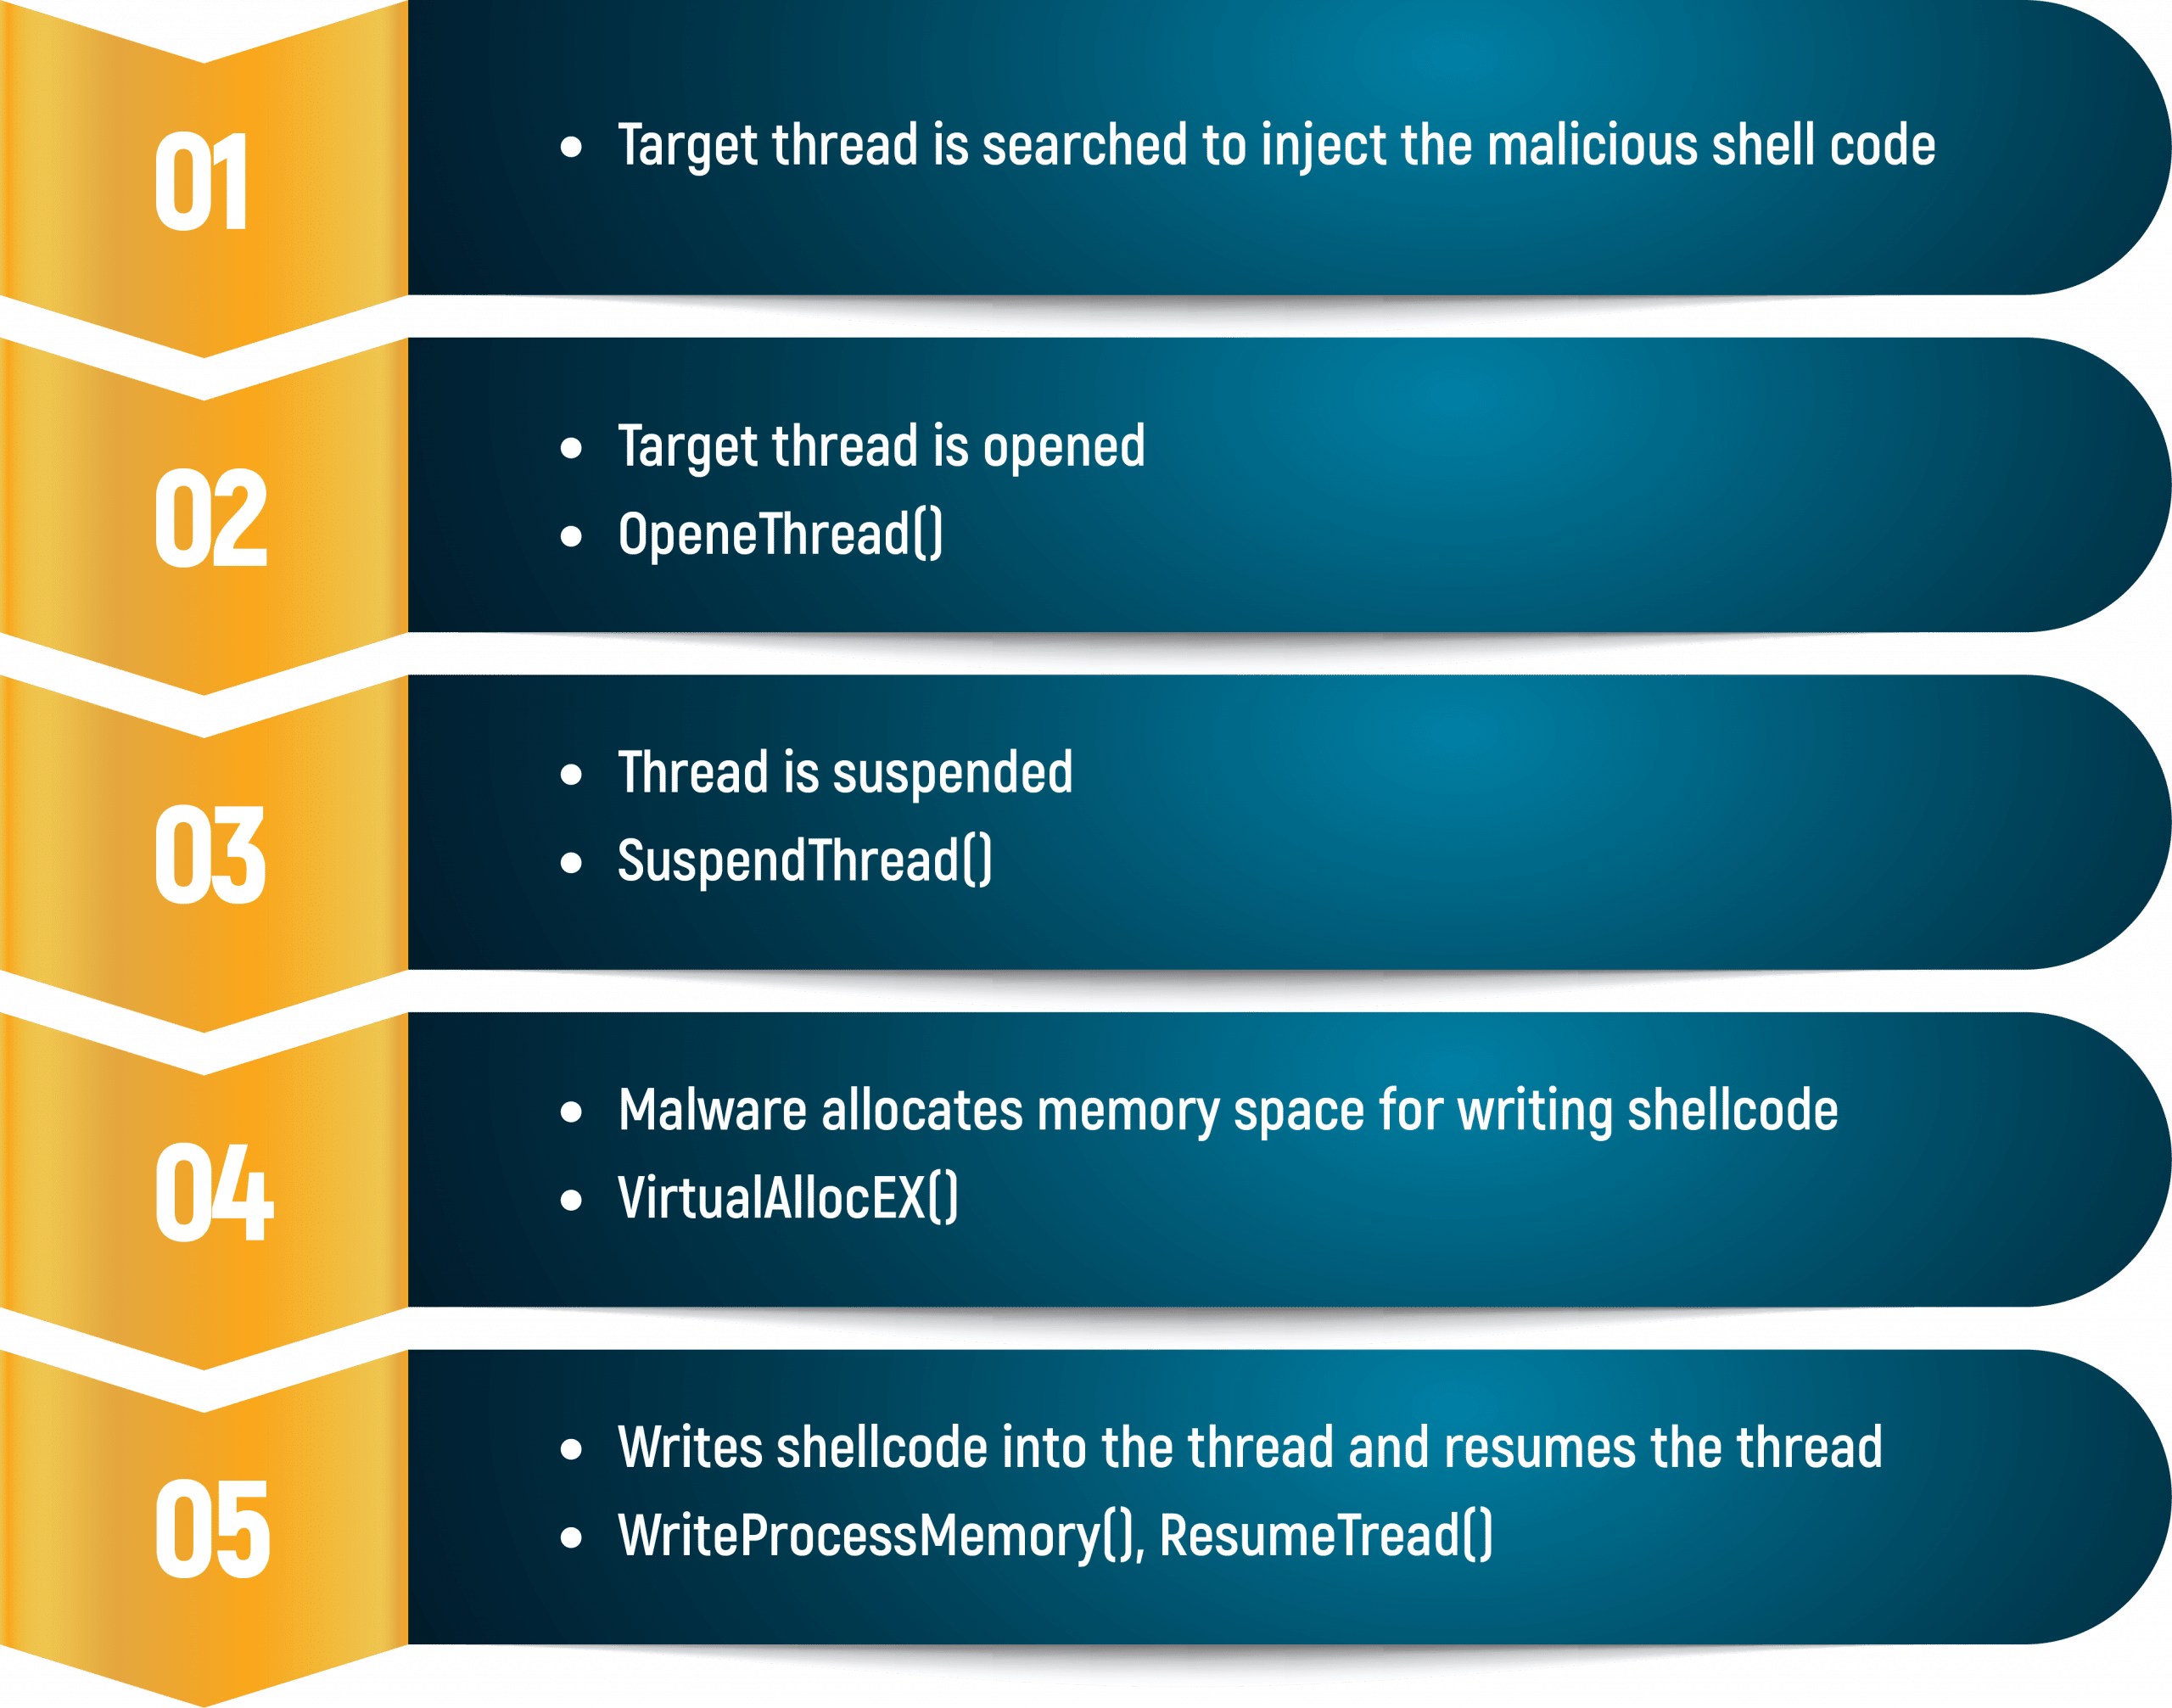
This technique can be used to inject malicious executables or in tandem with a reflective loading function.
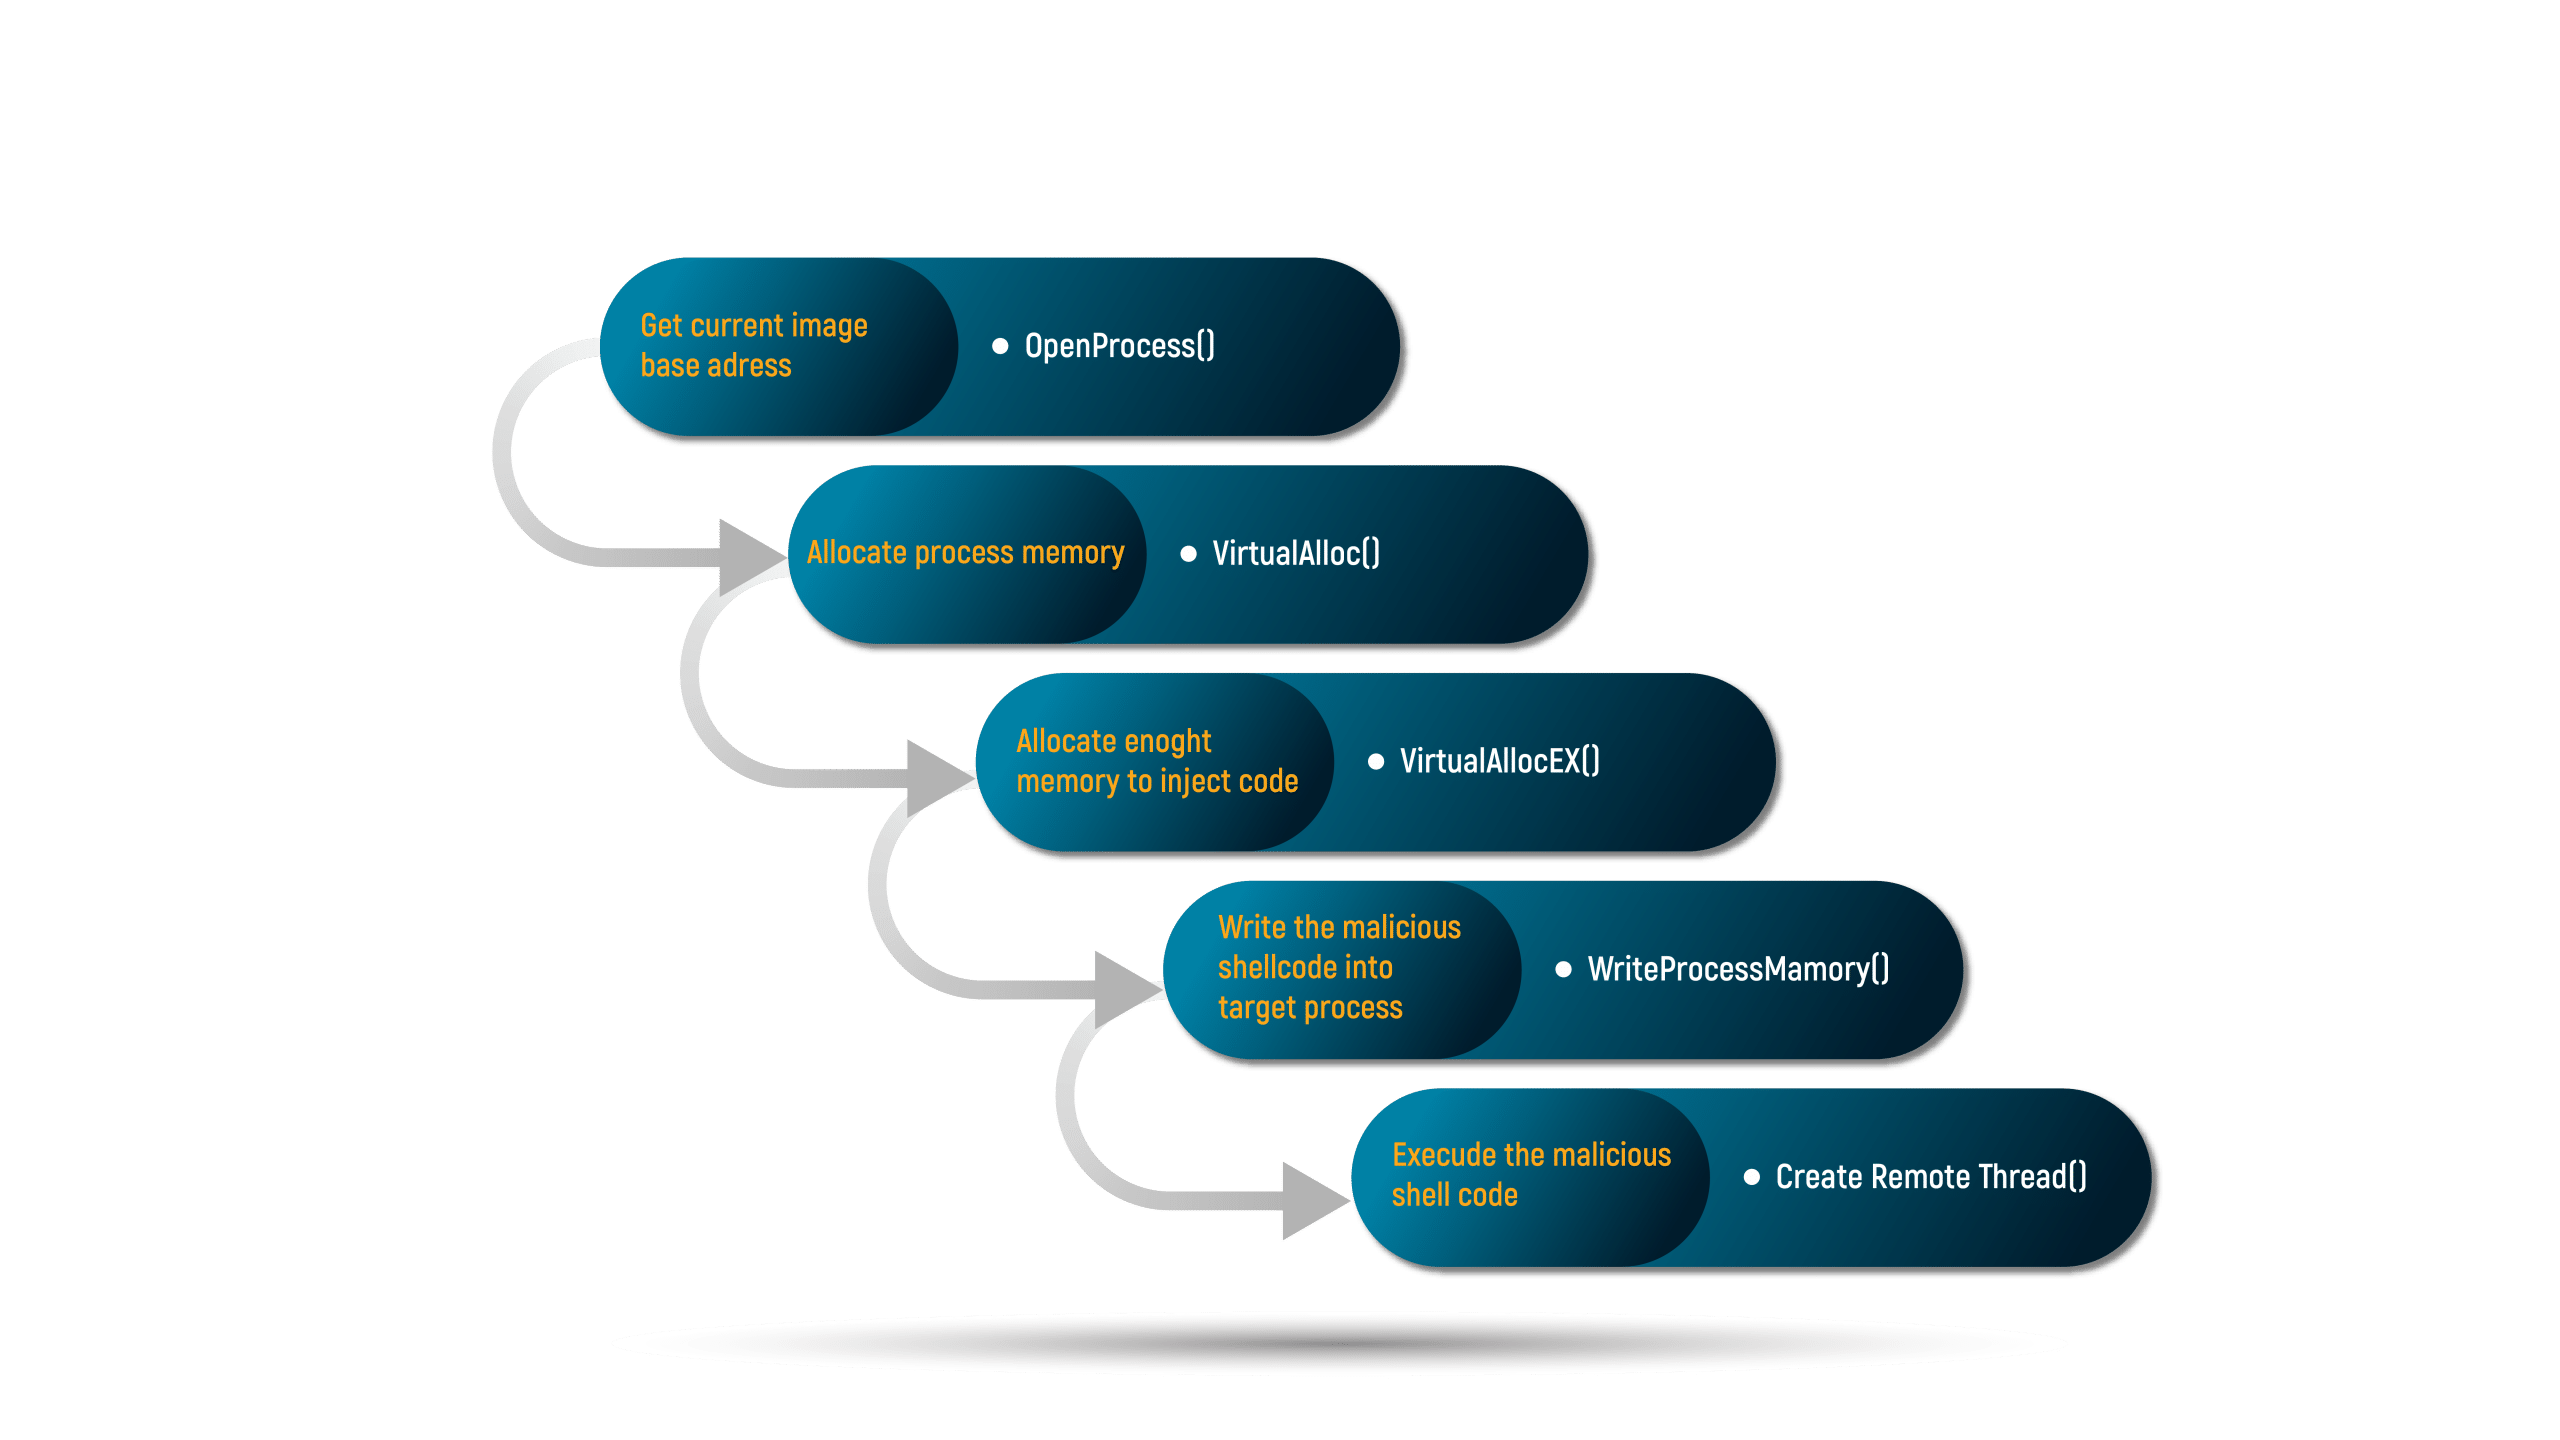
Like Reflective DLL injection, PE injection does not require the executable to be on the disk. This is the most often used technique seen in the wild. PE injection works by copying its malicious code into an existing open process and causing it to execute. To understand how PE injection works, we must first understand shellcode.
Shellcode is a sequence of machine code, or executable instructions, that is injected into a computer’s memory with the intent of taking control of a running program. Most shellcodes are written in assembly language.
Main flow (simplified):
Once we suspect a malware is injecting code into a legitimate process, we can verify our findings by tracking the malware’s API calls. We can be alerted by analyzing suspicious network activity from a legitimate process, or a legitimate process creating malicious files. We start by using the API monitor tool and configuring it to monitor all process injection-related API calls. (We’ve written above about the most common API calls, although there are also API calls from the DLL NTDLM.dll, which preform the same job but are less frequently detected by anti-malware products)
This tool is available for download at: http://www.rohitab.com/apimonitor
(although be aware, this tool is still in alpha and has some bugs to it).
First, we configure all suspicious API calls into the monitor program. We will inspect an info-stealer malware which preforms process injection.
Suspicious API:
We can configure the API by searching for it in the search bar and selecting the search box:
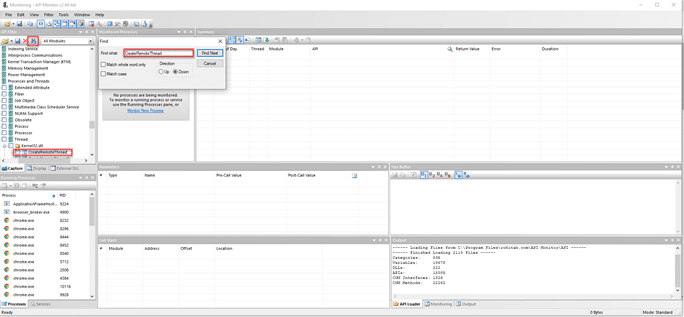
Once we have everything configured, we can run the file under monitoring, which will produce the following output:
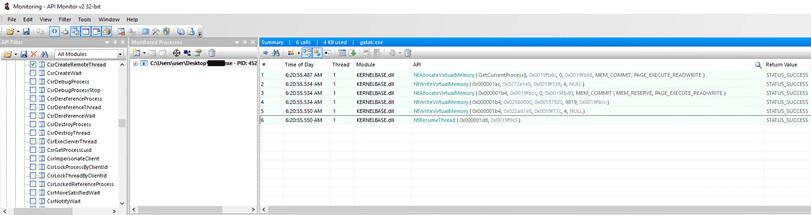
Clearly the process preforms process injection. We can now inspect the content of the injection:
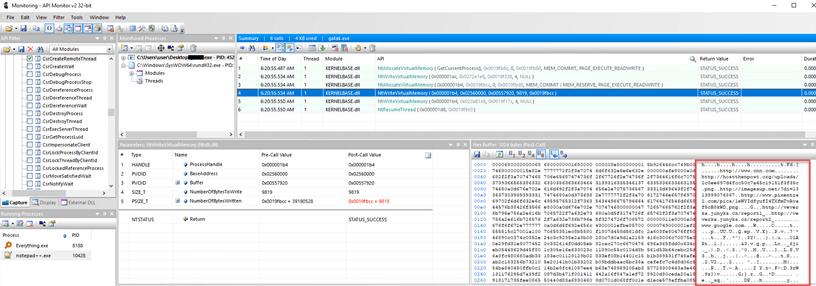
In the third function call we can see the buffer which clearly shows the injected shellcode. The only problem is that we cannot drop the entire buffer page, so we will inspect further in a debugger. In this example, we will use IDA debugger. Once the malware is loaded, we will search for further APIs the API Monitor did not catch (you can search by keyboard combination using CTRL + G):
CreateRemoteThread:

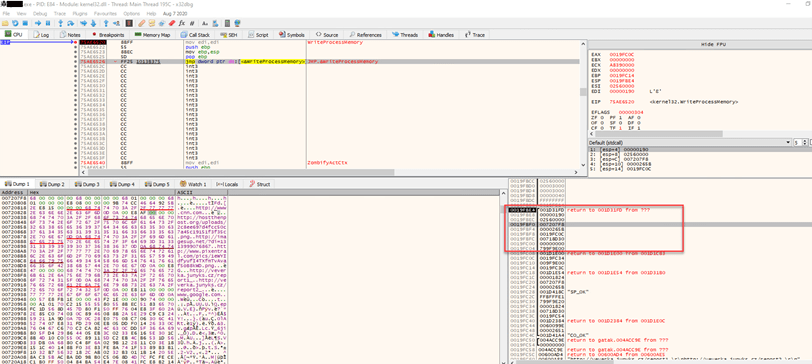
WriteProcessMemory:

We specifically searched for those two APIs to marked breaking point.
Once we run until the breaking point of WriteProcessMemory, we look at the following sections (pictured below):
Now let’s take a step back. The function WriteProcessMemory in MSDN is described as:
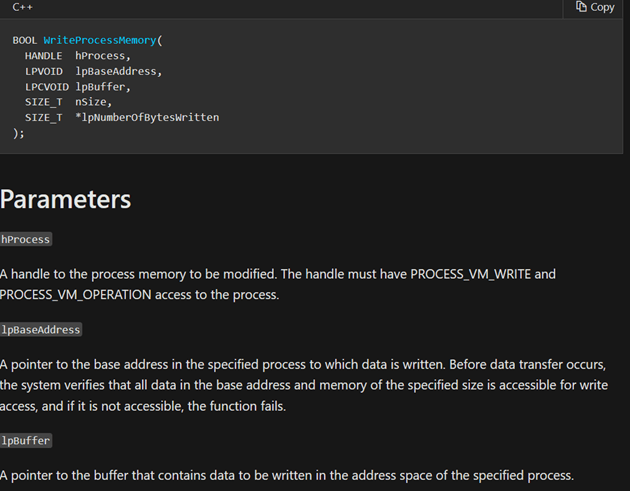
So, we are interested in the third parameter of this function as it is a pointer to the buffer with the soon-to-be-injected code. If we follow the third parameter to the buffer, we find the injected code once again:

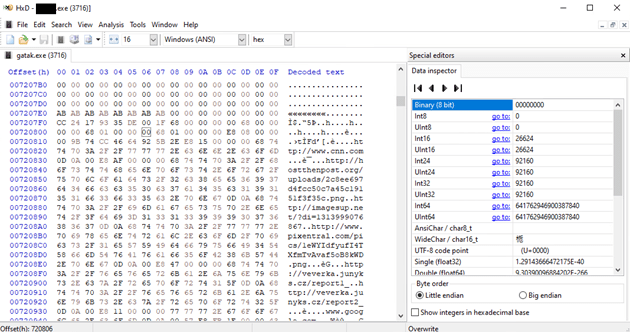
Now we know the exact location of the injected code in the buffer. We can open HxD to look into the process memory of the malware at the location of the injection. Now we can dump the injected shellcode and analyze it (this shellcode downloads a .PNG file which is an executable).
Cynet vs injection
Using Cynet360, we were able to detect a malicious process injection technique used within Cobalt Strike Beacon.
Cobalt Strike is an Adversary Simulations and Red Team Operations application. It uses these security assessments to simulate advanced adversaries penetrating a network. While penetration tests focus on unpatched vulnerabilities and misconfigurations, these assessments benefit security operations and incident response.
One of Cobalt Strike Beacon’s features is using unmanaged PowerShell DLL to execute a PowerShell command without using powershell.exe.
By using the simple command powerpick / psinject an attacker can inject a DLL which will execute a PowerShell command and evade most PowerShell detections.
To detect it, we set up a listener:

And once we executed using PowerPick/Powerinject:
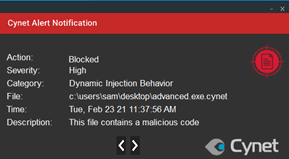
Cynet blocked the injection of the unmanned PowerShell executable. The command the attacker used on the PowerShell command is blocked. This can be a step in the attacker payload which will identify this process as malicious and could potentially reveal a hidden backdoor/hidden malicious file.
In the Cynet UI:

Search results for: